Uncategorized

Mimic

Here I’m sitting at coffeeshop late afternoon brushing few of core Linux concepts. All of sudden somehow my mind took me to read new content in hacker news. Its always like a celebration going through content in hackernews “USEFUL STUFF”. There I saw GNU Software foundation listed its 2017 free softwares, I found a phone operating system powering nexus and few samsung phones. In addition, one thing catched my eye which is Intelligent Personal Assistant i,e Mimic. A free software which converts your text to speech right from the terminal.

Here are the steps to install :-

Mine is a Mac, if your OS is any of Debian machines you should be fine no more issues.

git clone https://github.com/MycroftAI/mimic.git
brew install pkg-config portaudio
cd mimic && ./configure && make

To Test :-

Say something:

./bin/mimic -t "Hello. Doctor. Name. Continue. Yesterday. Tomorrow."

List internal voices:

./bin/mimic -lv

Set voice(internal):

./bin/mimic -t "Hello" -voice slt

Set voice(file):

./bin/mimic -t "Hello" -voice voices/cmu_us_slt.flitevox

Set voice(url):

./bin/mimic -t "Hello" -voice voices/http://www.festvox.org/flite/packed/flite-2.0/voices/cmu_us_ksp.flitevox

Print mimic help info:

./bin/mimic -h
MEAN

iDelivery- MEAN Stack Application

console.log(‘Hello World’)

Today I’m going to use scaffold enter yeoman generated full stack (Mangodb, Express, Angular and node-js boiler plate code). Trying to understanding the barebones of the project structure.

Let me start with app basic js files: app.js, app.config.js, app.constants.js

app.js:-

import angular from ‘angular’;

//ngCookies provides a convenient wrapper for reading and writing browser //cookies.

import ngCookies from ‘angular-cookies’;

//ngResource Provides interactive service with restful service API’s

import ngResource from ‘angular-resource’;

//ngSanitize provides ability to sanitize potential HTML tokens

//angular-socket-io exposes socketFactory which is an API for instantiating //sockets

import ‘angular-socket-io’;

//angular-ui-Router i s a powerful angular-js routing framework that provides //routing based on statemachine allows to provide multiple views from the //same page.

import uiRouter from ‘angular-ui-router’;

//Native angular js directives for Bootstrap

import uiBootstrap from ‘angular-ui-bootstrap’;

//import routeConfig from app.config.js

import {

routeConfig

from ‘./app.config’

}

//auth.module from components which is app specific

import _Auth from ‘../components/auth/auth.module’;

import account from ‘./account’;

import admin from ‘./admin’;

import navbar from ‘../components/navbar/navbar.component’;

import footer from ‘../components/footer/footer.component’;

import main from ‘./main/main.component’;

import constants from ‘./app.constants’;

import util from ‘../components/util/util.module’;

import socket from ‘../components/socket/socket.service’;

import ‘./app.scss’;

angular.module(‘iDeliveryApp’, [ngCookies, ngResource, ngSanitize, ‘btford.socket-io’, uiRouter, uiBootstrap, _Auth, account, admin, navbar, footer, main, constants, socket, util])

.config(routeConfig)

//Use the run method to register work which should be performed when the //injector is done loading all modules.

.run(function($rootScope, $location, Auth)  {

//Annotation of angular -js https://github.com/olov/ng-annotate

‘ngInject’;

$rootScope.$on(‘$stateChangeStart’, function(event, next)) {

Auth.isLoggedIn(function(loggedIn) {

if (next.authenticate && !loggedIn) {

$location.path(‘/login’);

}

});

});

});


Uncategorized

Day # 14 Connecting our application to a REST API using ngResource

Display images with ng-src :-

Today in the contacts table we will display the image by replacing in the place of Birthday column. In Index.html, we will replace the index with images ng-src.


<!-- trimmed code -->
<td> src="{{person.photo}}" class="img-circle profile-photo"alt=""</td>
<!-- trimmed code -->

We will add the class profile-photo into main.css


.table {

tr {

 td {

 vertical-align: middle;
 .profile-photo {

width: 30px;
height: 30px;

 }

}

}

}

Uncategorized

Day # 13 Connecting our application to a REST API using ngResource

Promises in AngularJS with $q service :-

Yesterday we were able to create the form and save it. But we want to exit the form once we click on save button. form is actually retrieved from createModal of showCreateModal scope variable which has the template. We need to call the hide function from createModal.  we will create the promise function to hide the form and for this purpose we use $q which is a support parameter to $promise.


//trimmed code

app.service('ContactService', function (Contact, $q) {

//trimmed code

//trimmed code

'createContact': function (person) {
 var d = $q.defer();
 self.isSaving = true;
 Contact.save(person).$promise.then(function () {

 self.isSaving = false;
d.resolve()
});

return d.promise;

}

//trimmed code

And in the createContact we will hide the modal.


As you could notice in the above screencast, we will make sure we clean the contact list which will not spread onto contactDetail once we save the save the form.


//trimmed code createContact service

Contact.save(person).$promise.then(function () {
 self.isSaving = false;
 self.selectedPerson = null;
 self.hasMore = true;
self.page = 1;
 self.persons = [];
 self.loadContacts();
 d.resolve()

});

//trimmed code

code :- https://github.com/praneethkumarpidugu/angular1-core/commit/fd837b7d4f71b02e08032b6e4724414194036f7d

Uncategorized

Day # 12 Connecting our application to a REST API using ngResource

Kick starting my day after 2 days of break (I cursed myself) for breaking the practice for at a strectch past two days. Anyways better not late ad no regrets for now.

Creating a bootstrap modal using angularStrap :-

Until now we are able to display the list, update the list and delete the list. But we are left with one step which is creating the list. We will start by adding the Create button adjacent to search box options. Next thing we will aim is that if we click on create button it should pop up a dialog box where we fill out the form to create the table entry. We will use angular strap (http://mgcrea.github.io/angular-strap/), checkout the examples and they are very impressive. We will install angularstrap through bower. As usually we will also add dependencies in index.html and main.js. Next thing we will link the angular strap into the button.


&lt;!-- trimmed code--&gt;

&lt;button class=&quot;btn btn-primary pull-right&quot; ng-click=&quot;showCreateModal()&quot;&gt;Create&lt;/button&gt;

&lt;!--trimmed code--&gt;

Above code is under the PersonListController in main.js. Hence our duty is to add the showCreateModal into PersonLisController.


//trimmed code and we will add $modal which is a service in PersonListController

$scope.showCreateModal = function (){
$scope.CreateModal = $modal({
scope: $scope,
template: 'templates/modal.create.tpl.html',
show: true

})

}

//trimmed code

code:- https://github.com/praneethkumarpidugu/angular1-core/commit/c9128a6202ee0ef861e4fac03bc86037fd59783f

Reusing snippets of html with ng-include :-

We will use the contact edit page for createModal. For this purpose we will angular-directive called ng-include. Firstly we will cut the form elements and use ng-include to include this into another source html file. In the include section of index.html, we will add the ng-template in a script tag.


&lt;!-- trimmed code --&gt;

&lt;script type=&quot;text/ng-template&quot; id=&quot;templates/form.html&quot;&gt;&lt;/script&gt;

&lt;!-- we will paste the cut form code--&gt;

&lt;!--trimmed code --&gt;

Okay! so the point of include id with ng-template is to make it as a re-usable code which could be utilized at any point in index.html. For this time we will override it by utilizing it from templates real folder.

code:- https://github.com/praneethkumarpidugu/angular1-core/commit/e516df98e47684709a5f81ffcf2476b80a073854

Creating a contact using our resource :-

Firstly, we will create our modal template.

&lt;div id=&quot;createModal&quot; class=&quot;modal&quot; role=&quot;dialog&quot;&gt;
&lt;div class=&quot;modal-dialog&quot;&gt;
&lt;div class=&quot;modal-content&quot;&gt;
&lt;div class=&quot;modal-header&quot;&gt;

&lt;button type=&quot;button&quot; class=&quot;close&quot; ng-click=&quot;createModal.hide()&quot;&gt;&amp;times;&lt;/button&gt;
&lt;h4 class=&quot;modal-title&quot;&gt;Create Contact&lt;/h4&gt;
&lt;/div&gt;
&lt;div class=&quot;modal-body&quot;&gt;

&lt;form ng-submit=&quot;createContact()&quot; class=&quot;form-horizantal&quot; novalidate&gt;

&lt;ng-include src=&quot;'templates/form.html'&quot;&gt;&lt;/ng-include&gt;

&lt;/form&gt;&lt;/div&gt;
&lt;/div&gt;
&lt;/div&gt;
&lt;/div&gt;

Next thing is to create “createContact()” function in main.js.


//trimmed code and we will add below code in PersonListController

$scope.createContact = function (){

console.log(&quot;createContact&quot;)

};

//trimmed code

We need to add showCreateModal which has template linked with form in index.html, when we click on create button.


//trimmed code

$scope.showCreateModal = function () {
$scope.createModal = $modal({
scope: $scope,
template: 'templates/modal.create.tpl.html',
show: true
})

};

//trimmed code

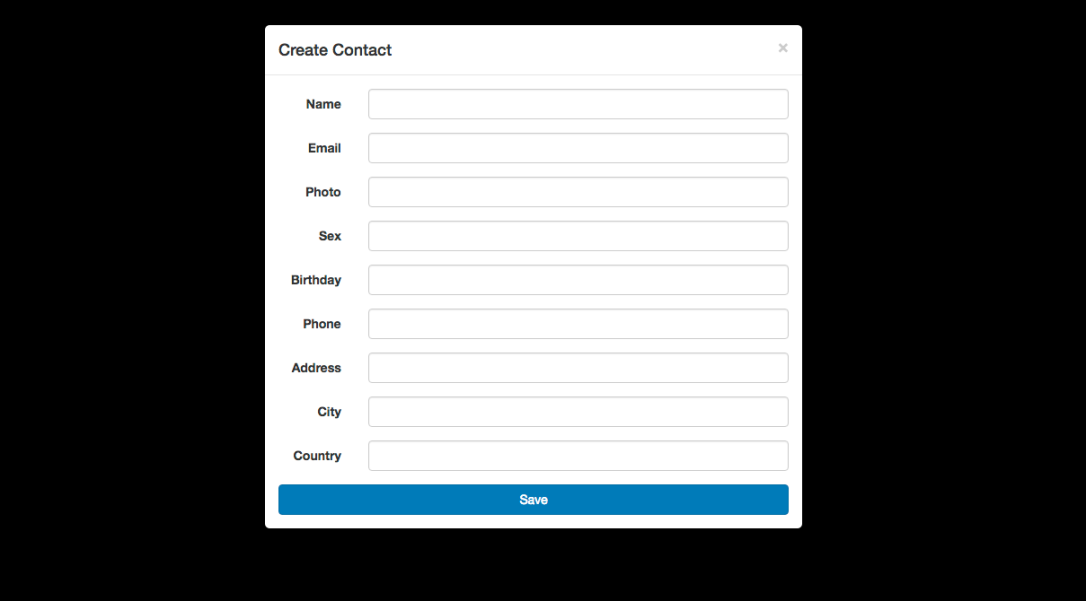
Below is the screenshot when we click on create button which is linked with form.html.

Screen Shot 2016-07-11 at 10.21.26 pm.png

Now we will create the contact.


//trimmed code

$scope.createContact = function () {
console.log(&quot;createContact&quot;);
$scope.contacts.createContact($scope.contacts.selectedPerson)

};

//trimmed code

Since both createModal and createContact both using selected Person, we will null the value of createModal when createContact is selected.

Next we will create the service createContact in contactService which has the functionality similar to updateContact.


//trimmed code contactService

'createContact': function (person) {
self.isSaving = true;
person.$update().then(function () {
self.isSaving = false;

});

}


code :- https://github.com/praneethkumarpidugu/angular1-core/commit/204af753398feddd7c49bf1d9e6f4e77bd6edcfe


Uncategorized

Day # 11 Connection our application to a REST API using ngResource

Updating a contact using our resource :-

Yesterday in index.html we have declared save function in the form tag. Hence we will add this save function in main.js > PersonDetailController.


//trimmed code
//PersonDetailController
&nbsp;$scope.save = function (){

&nbsp; $scope.contacts.updateContact($scope.contacts.selectedPerson)

}

//trimmed code

Now we will create updateContact in our service.


//trimmed code
//ContactService
},

'updateContact': function (person) {

&nbsp; console.log('service called update');

}

//trimmed code

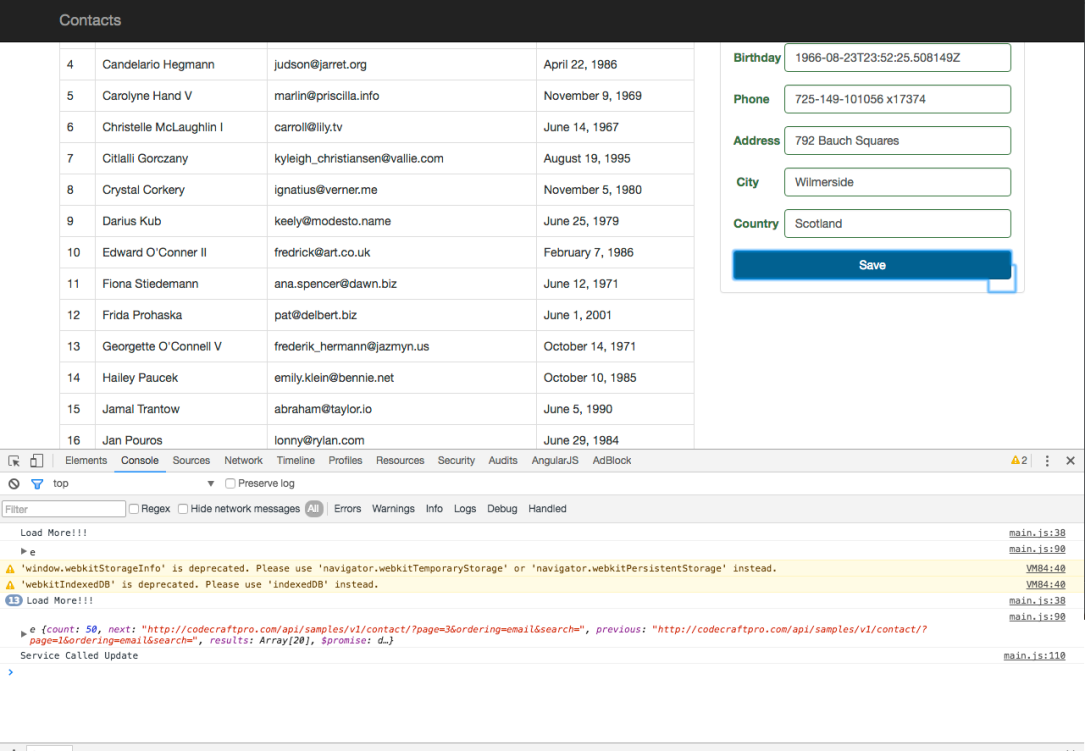
Please find the log message when we click on save button in the below screenshot.

Screen Shot 2016-07-07 at 11.02.10 pm

To update contacts we need to do a bit of modification to our contactResource inorder to playaround PUT function. In main.js we will update the factory Contact where we have defined API url and add two additional paramters inside $resource. First one is map with id and second one is the update with method PUT.


//trimmed code

app.factory('Contact', function($resource) {

&nbsp; return $resource("API_URL", {id:'@id'}, {

&nbsp; &nbsp;update: {

&nbsp; &nbsp; &nbsp; &nbsp; &nbsp; &nbsp;method: 'PUT'

&nbsp; &nbsp; &nbsp; &nbsp; &nbsp; }

&nbsp;});

});

//trimmed code

We have our update resource ready and we will hook it up to the service.


//trimmed code
//ContactService
},

'updateContact': function (person) {

&nbsp; console.log('service called update');
&nbsp; Contact.update(person);

}

Now we are able to hook data between detail and table, make modifications. But we are not able to give proper user feedback when we click on a button.  For this purpose we will ladda button.  First step is to add the isSaving entry into the service. when we are saving we will isSaving = true and the point of time we finished we will udpate isSaving = false. To achieve this we will use promise. In index.html, ladda button with contacts.isSaving is already added.


//trimmed code

//ContactService
},

'updateContact': function (person) {

&nbsp; console.log('service called update');
&nbsp; self.isSaving = true;
&nbsp; Contact.update(person).$promise.then(function (){
&nbsp; &nbsp;self.isSaving = false;

});

//trimmed code

There is also another way to update it with resources.

such as


//trimmed code

//ContactService
},

'updateContact': function (person) {

&nbsp; console.log('service called update');
&nbsp; self.isSaving = true;
&nbsp; person.$update().then(function (){
&nbsp; &nbsp;self.isSaving = false;

});

//trimmed code

code :- https://github.com/praneethkumarpidugu/angular1-core/commit/7d662b95608d3757ea65a6a1970cbc5645c3f720

Delete a contact using our resource :-

Now we will add a button to remove a contact. For this purpose we will add a delete button under the Details panel heading. Just as we did with update above we will do similar modifications to remove.

code:- https://github.com/praneethkumarpidugu/angular1-core/commit/da4f1bc9cc8ca184f27f0ce0fa4c71a1637424b5


Uncategorized

Day # 10 Connecting our application to REST API using ng-resource

Showing a warning when no results are returned :-

Previously alert message “No results found for search term” was showing even when the spinner is loading. We will a condition to ng-show that to show alert only when length of contacts is zero and when contacts is not loading. We keep this everything inside a div element below table.


<!-- trimmed code --></table>
<div ng-show="contacts.persons.length == 0 && !contacts.isLoading">

<!-- trimmed code -->

code:- https://github.com/praneethkumarpidugu/angular1-core/commit/13052a58a6035c4b3f91addbefa7eacce906b9f1

Convert the detail panel to a form :-

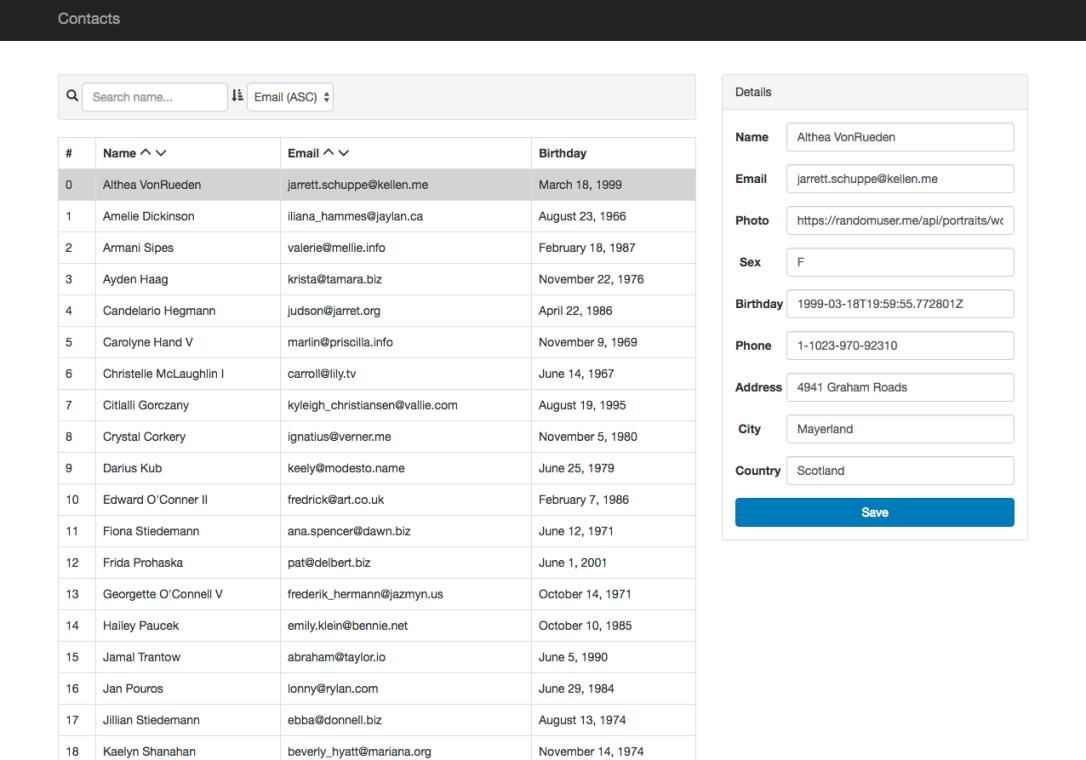
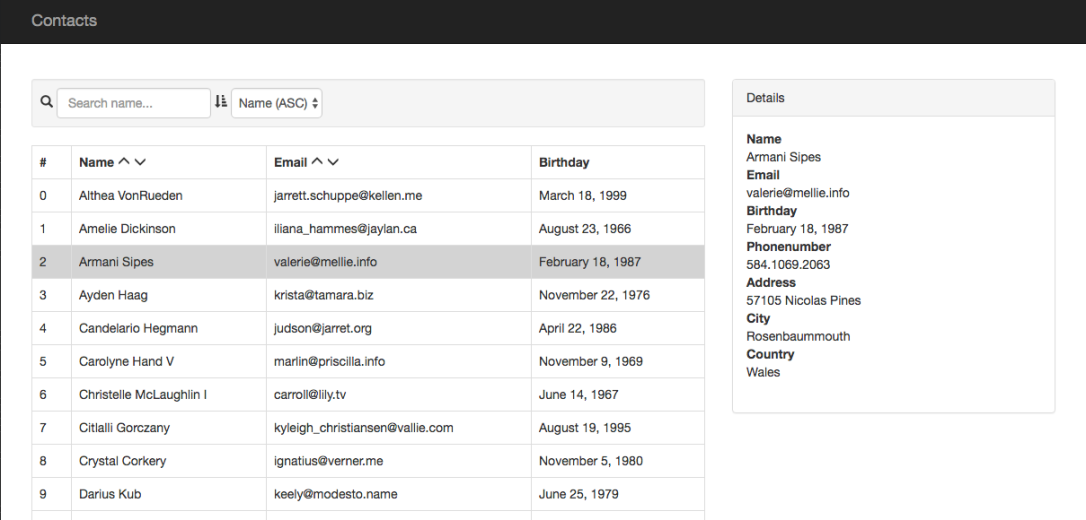
Here we will update our contact application. So instead of just reading out the forms we will make a form to make any modifications to the contact details.  Firstly we will remove the panel-body horizantal list. Then we will add the form linking with server database.


<!-- trimmed code -->
<div class="panel-body">

<form class="form-horizantal" ng-submit="save()" novalidate>
<div class="form-group">

<label class="col-sm-2 control-label">Name</label>
<div class="col-sm-10">
<input type="text" class="form-control" name="name" ng-model="contacts.selectedPerson.name" required />
</div>
</div>
<!-- And so on for age, address, sex, phonenumber, country -->

</form>

<!--trimmed code-->

Screen Shot 2016-07-06 at 11.38.14 pm.png

For doing validation of all the inputs we will angular-auto-validate.

$ bower install angular-auto-validate

For giving feedback to users when we submit the button we will use angular-ladda

$ bower install angular-ladda

Then we will add the dependencies in index.html and main.js

code:- https://github.com/praneethkumarpidugu/angular1-core/commit/842c9f08271ea6cd3ac19831b15d8cc10563f364


Uncategorized

Day # 9 Connecting our application to REST API using ngResource

Server side sorting and searching :-

Whenever if any one types anything in search field we will pass that value as the query parameter. First thing we will do is whenever we type we have to see if the value is defined in the list or not or is it blank.


//Trimmed code

$scope.$watch('search', function (newVal, oldVal) {
if (angular.isDefined(newVal)) {
$scope.contacts.doSearch(newVal);

}

})

//Trimmed code

Since we are doing search, we will reset after everything is done.


//trimmed code

'persons': [],

'doSearch': function (search) {
self.hasMore = true;
self.page = 1;
self.persons = [];

},

//trimmedcode

After we reset everything, we will store the search in an object


//trimmed code

'persons': [],
'search': null,
'doSearch': function (search) {
self.hasMore = true;
self.page = 1;
self.persons = [];
self.search = search;
self.loadContacts();
},

//trimmed code

For loadContacts function, in the param variable we will add search.

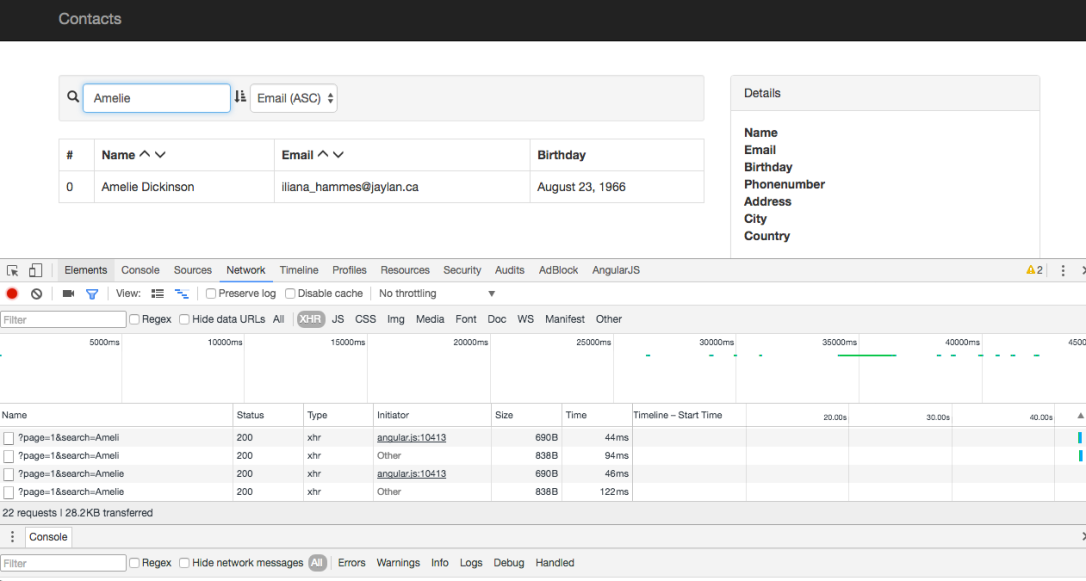
When we run the local Server, we could observe through network console how we are querying.

Screen Shot 2016-07-05 at 11.14.29 pm.png

But the ordering is broken! :/

To fix this we will follow same $watch which we have used for search, we will use it for order.

code:- https://github.com/praneethkumarpidugu/angular1-core/commit/f35051aed3d9868800694727d439b8eccf5513e6

Adding a loading spinner :-

For this purpose we will using angular directive called spin.js https://github.com/urish/angular-spinner

we will install through bower

$ bower install angular-spinner

We will add the dependency in both index.html and main.js. To intially playaround with spinner, we will add this below table tag in index.html.

</table>
<span us-spinner="{radius:8, width:5, length:3, lines:9}"></span>

We will load the spinner only when contacts isLoading.

<div ng-show="contacts.isLoading">

<span us-spinner="{radius:8, width:5, length:3, lines: 9}"></span>`

</div>

code:- https://github.com/praneethkumarpidugu/angular1-core/commit/812a46d48256998af1eda8b26bcda5745163629a

Uncategorized

Day#8 Connecting our application to REST API using ngResource

Removing client side searching and sorting :-

Until the previous blog, if I start the localserver, items in the table are showing according to the selected order. But the order is only showing up for only first 20 items and we need to sort for all the items.  Instead of client side sorting we will make the server side searching and sorting.  In index.html, we will modify the tr tag which is filtering items and remove them by replacing with server side searching and sorting.

code:- https://github.com/praneethkumarpidugu/angular1-core/commit/bd4585a3a7ccaea9c104ee2245574d500abb1d9d

watch scope variables for changes :-

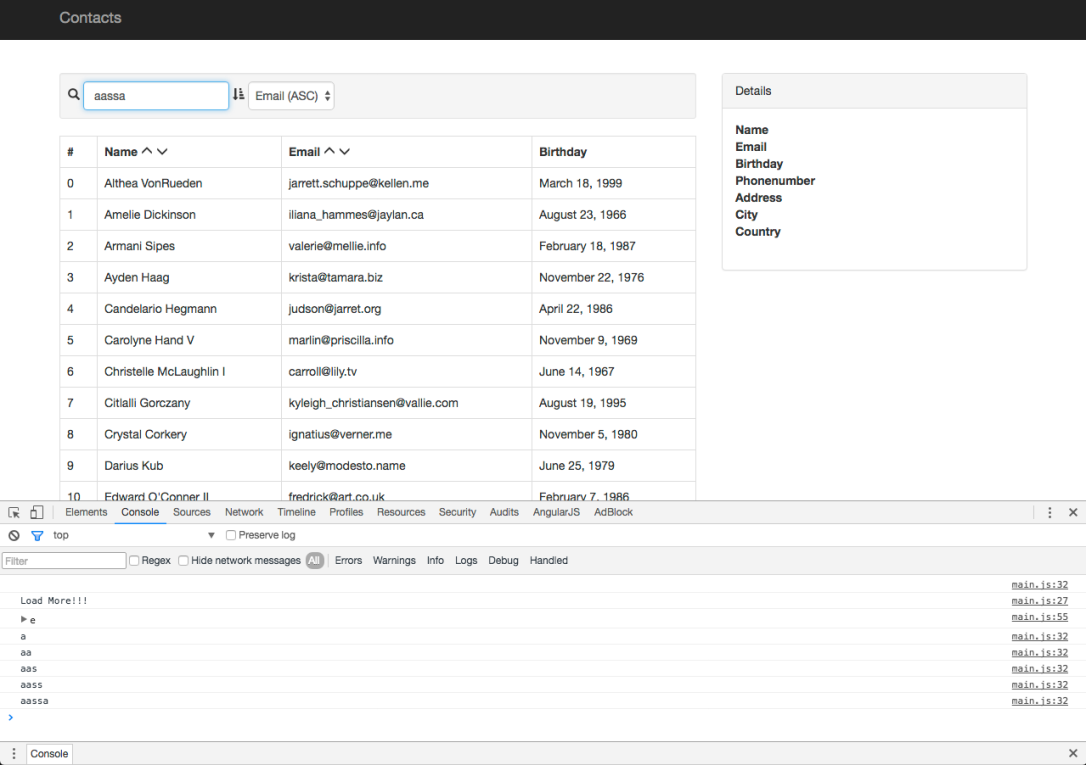
watch is way of notifying whenever variables change on scope. First of all we will remove sensitive search from main.js.  For testing around basic watch variables we define with $watch scope variable with search string and second parameter a function with newVal and oldVal as function parameters. Currently we will simple log the newVal as we type in the search field.

code:- https://github.com/praneethkumarpidugu/angular1-core/commit/05c49a4c480a34bb8be9f5c2f2ad4fc63c4403a1

Screen Shot 2016-07-04 at 11.16.03 pm


Uncategorized

Day 7: Connect our application to a REST API using ngResource

Creating our first resource :-

Initially we are going to write the first resource in a factory format which is similar to a service.


//trimmed code

app.factory("contact", function($resource) {

return $resource("API_URL");

});

//trimmed code

This resource helps to manage all the CRUD operation on the API. Next we will inject the contact resource into ContactService. In the app service for the object self we are going to add three additional variables page, hasMore, isLoading and additionally we will add a function called loadContacts which is going to get the data from rest api url.

Screen Shot 2016-06-24 at 7.04.28 pm.png


Setting up ngInfinite Scroll :-

ngInfinite  Scroll is a third party application. we add the dependency in both index.html and main.js. After adding dependencies we all add the infinite-scroll directive to table tag with function loadMore() and infinite-scroll-distance of 3.

code:-  https://github.com/praneethkumarpidugu/angular1-core/commit/2c93783aa1d47bf3b2e40c0a5dd378c436131ab6

Implementing pagination :-

Here we will connect the loadMore function on controller to loadMore on service. Every we reach the bottom of the page a request is hitting to api which we dont want.

code:-  https://github.com/praneethkumarpidugu/angular1-core/commit/e8437d9919cece2f3a0c0c645807e1fe85131664